How to add IPFLY proxy in ixBrowser
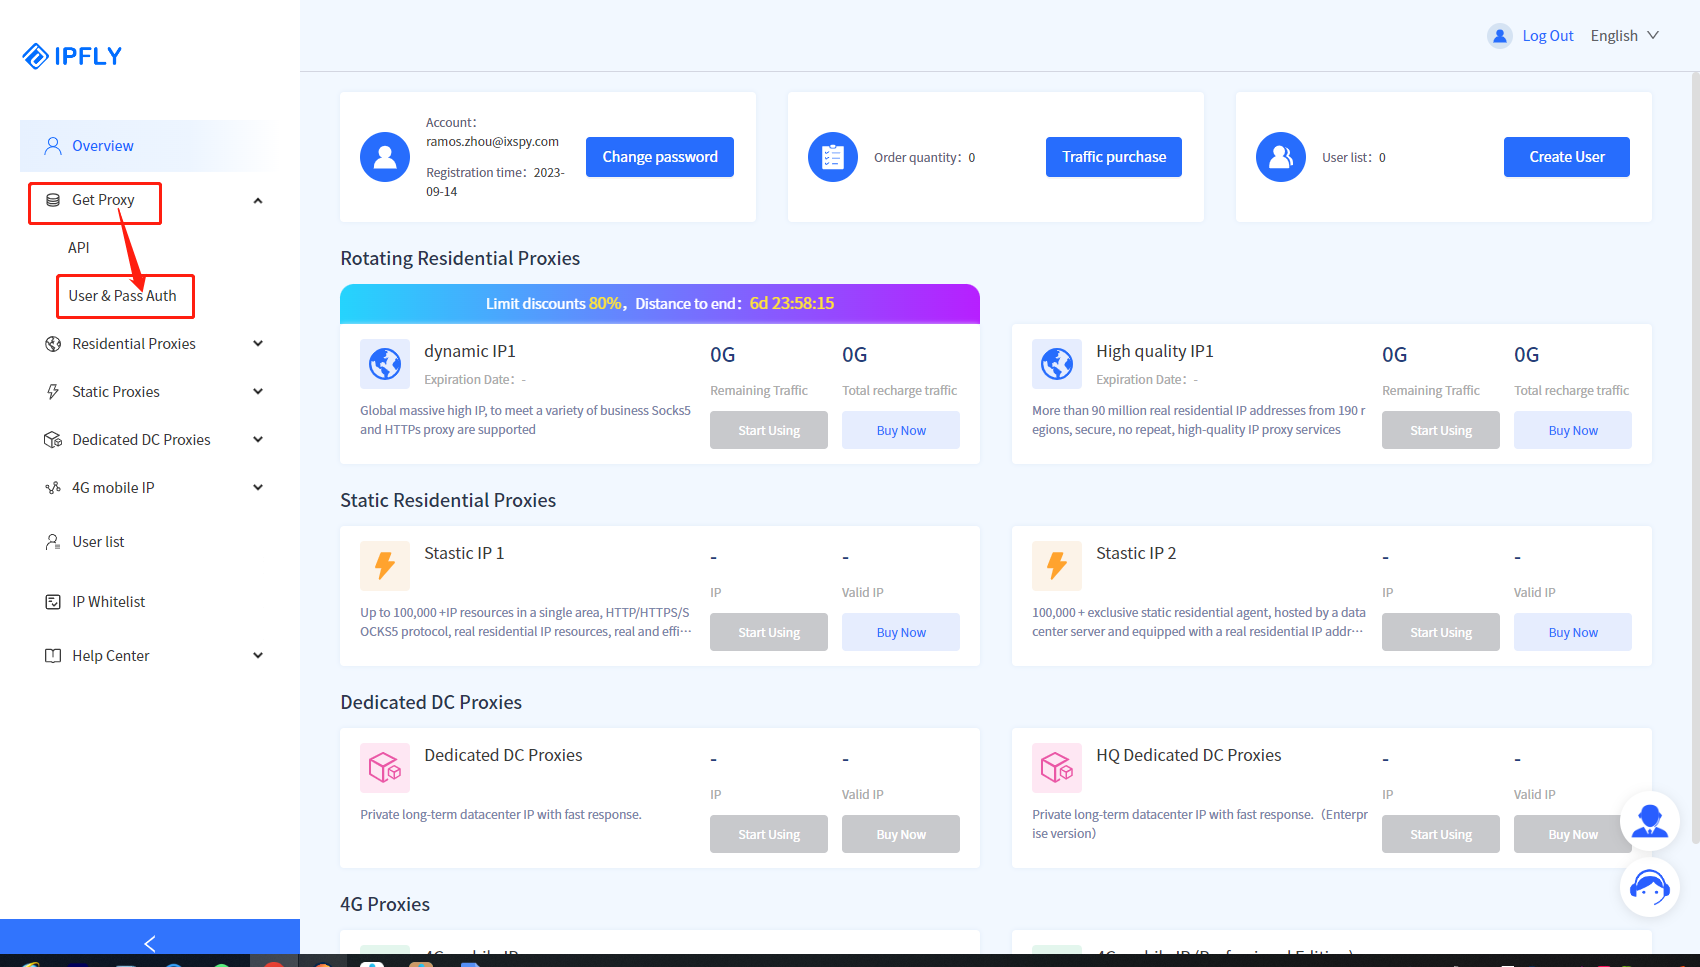
Step 1: visit the IPFLY official website, register and login to your account, click “get proxy > User & Pass Auth” in left left menu bar
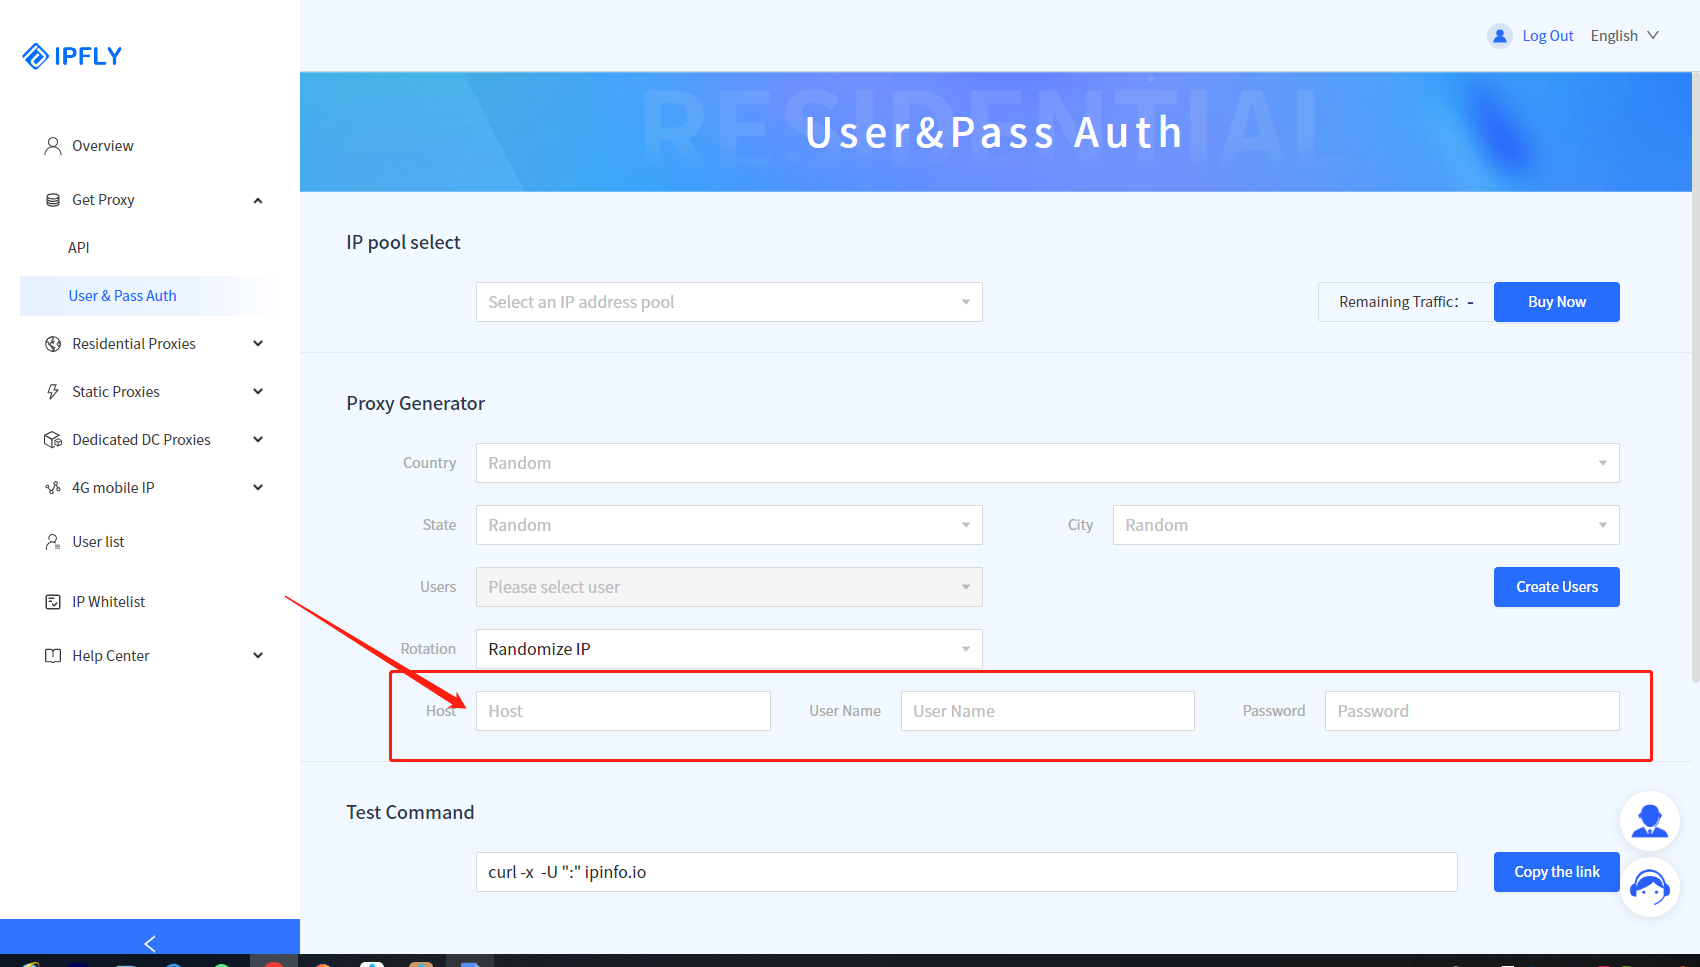
Step 2: set proxy parameters and automatically generate proxy information [address:port], [proxy username], [password]
Step 3: download, register, and login ixBrowser

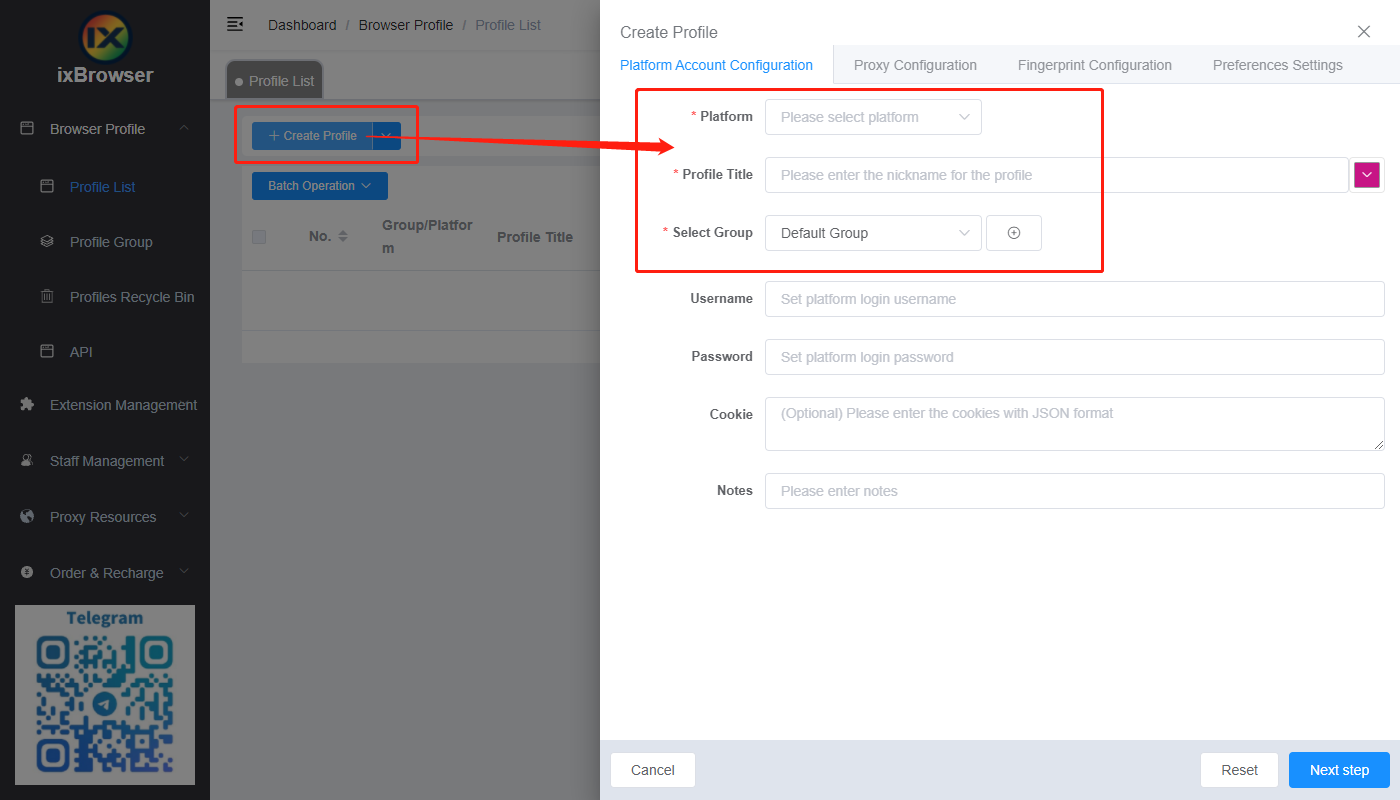
Step 4: click “Create Profile,” choose platform, group, and enter profile title on the pop-up page
Step 5: in Proxy Configuration page, select proxy method (Custom), and proxy type, enter proxy information copied from step 2
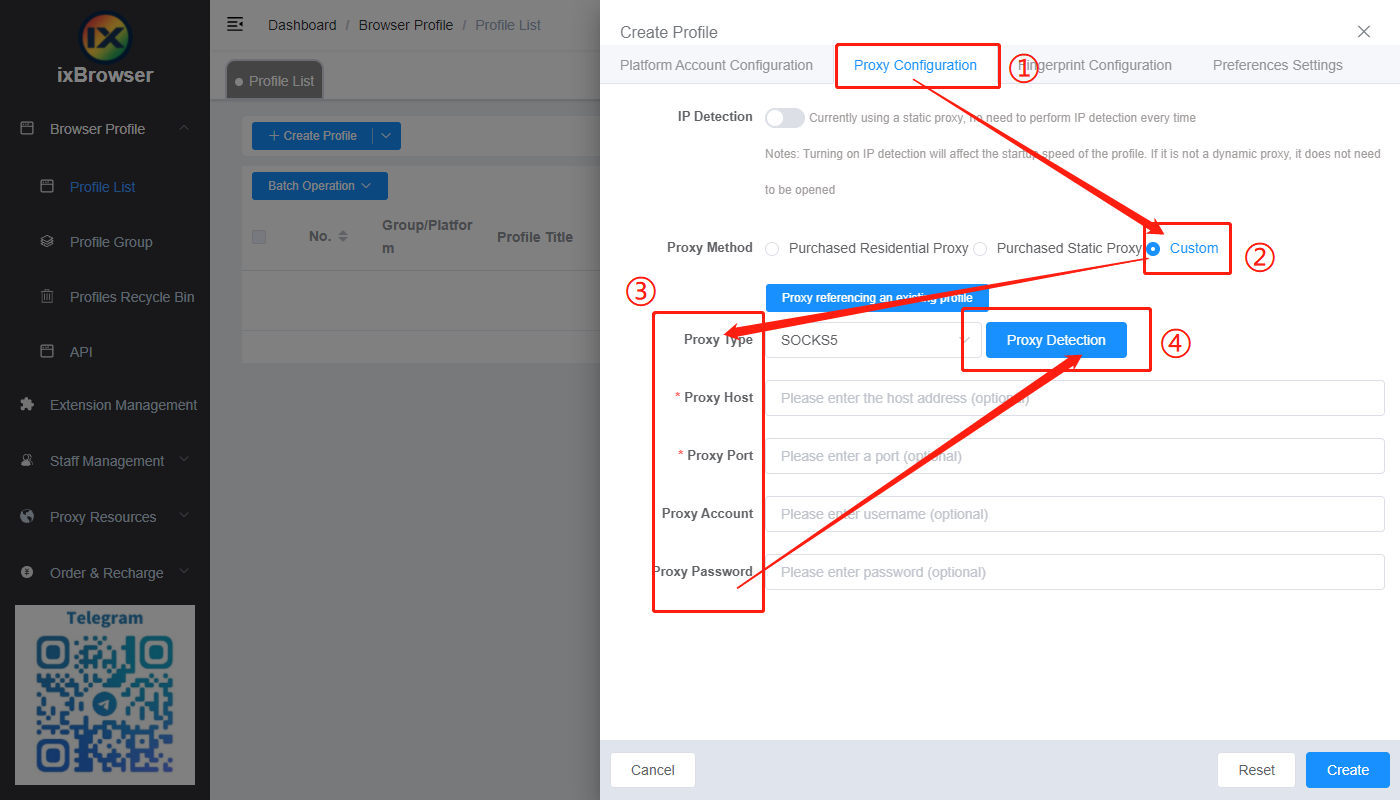
Step 6: after the proxy detection passes, click “Create” button below to complete the profile creation operation, and the profile can be opened and use in the Profile List page
Step 2: set proxy parameters and automatically generate proxy information [address:port], [proxy username], [password]
Step 3: download, register, and login ixBrowser
Step 4: click “Create Profile,” choose platform, group, and enter profile title on the pop-up page
Step 5: in Proxy Configuration page, select proxy method (Custom), and proxy type, enter proxy information copied from step 2
Step 6: after the proxy detection passes, click “Create” button below to complete the profile creation operation, and the profile can be opened and use in the Profile List page